Chapter 29 · Part 4
Create a WhatsApp Template
Build your own WhatsApp message templates directly in the portal — a live preview shows the exact message as you type, and every template is submitted to Meta for approval before it can be used for sending.
Opening the template builder
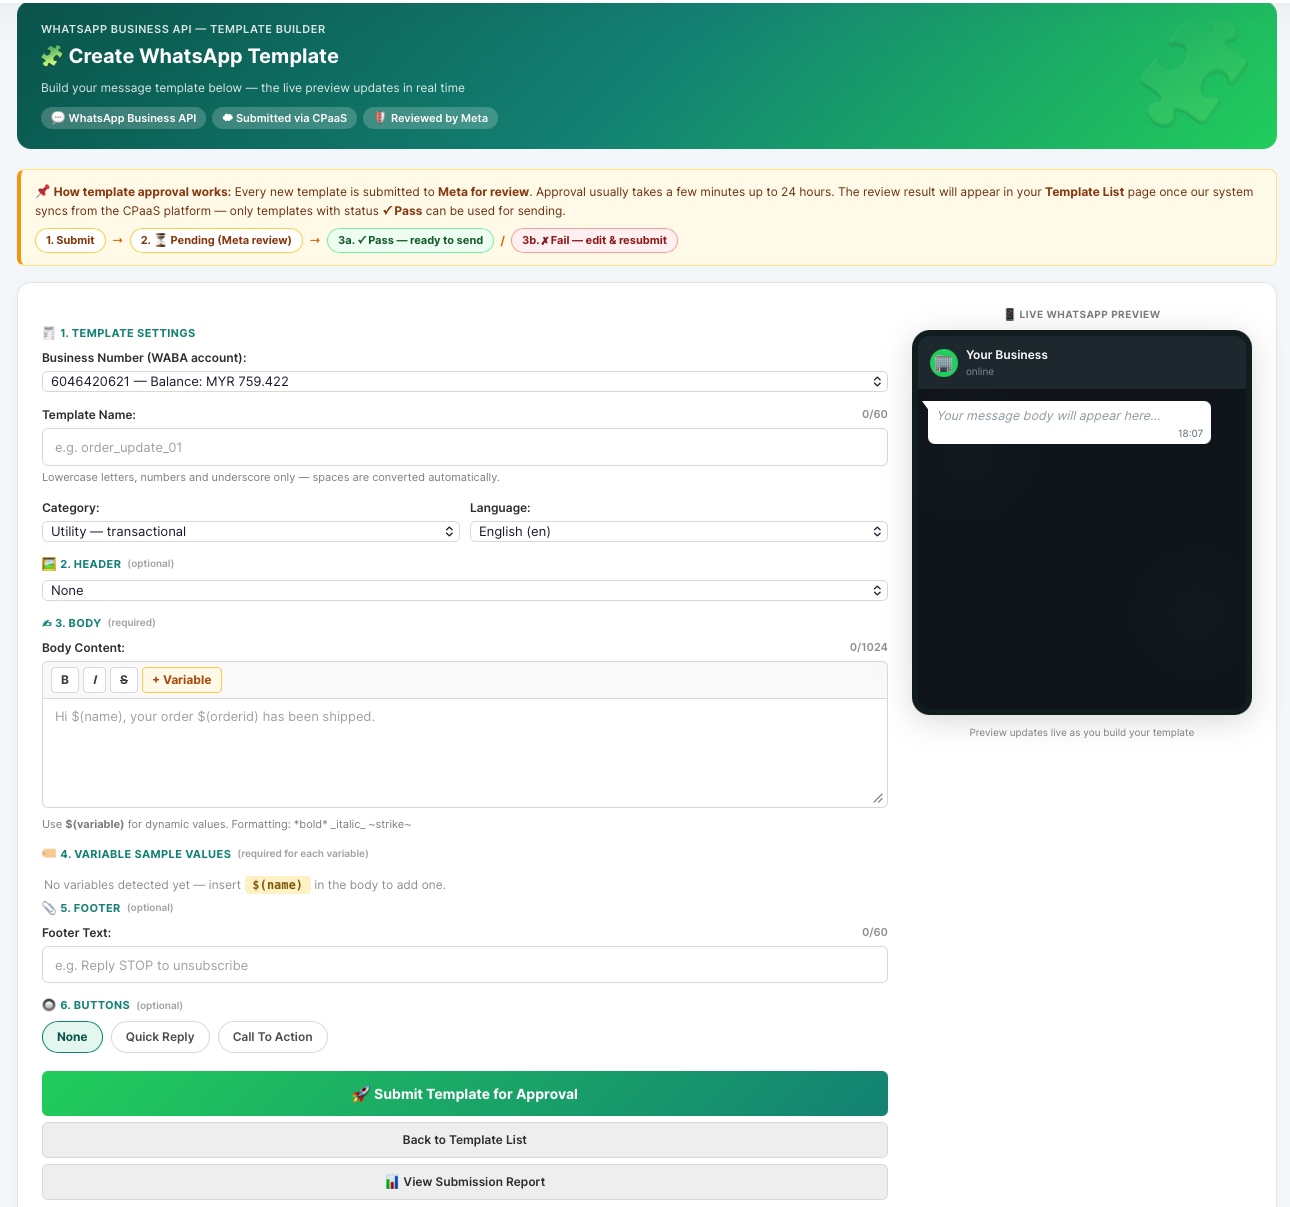
In the sidebar, open WhatsApp Business API → Manage Template. The builder shows the form on the left and a live WhatsApp preview on the right that updates in real time as you build.
Creating a general template (Utility / Marketing)
- 1
Template settings
Choose the Business Number to create the template under, then enter a Template Name — lowercase letters, numbers, and underscore only (spaces are converted automatically), max 60 characters. Pick the Category (Utility for transactional messages, Marketing for promotional) and the Language.
- 2
Header (optional)
Add a header if you want one: Text (up to 60 characters), or Image / Video / Document. For media headers, provide a publicly accessible sample media URL — Meta uses it during review; the actual media can be set when sending.
- 3
Body
Write the message body (up to 1,024 characters). Use the toolbar for *bold*, _italic_, and ~strikethrough~, and click + Variable to insert a dynamic value such as
$(name)or$(orderid). The preview on the right shows exactly how the message will look. - 4
Variable sample values
Every variable you use appears in the Variable Sample Values section — enter a realistic example for each one. Meta requires these samples to review your template.
- 5
Footer & buttons (optional)
Add a Footer (up to 60 characters) and Buttons: up to 3 Quick Reply buttons, or up to 2 Call To Action buttons (max 2 website links, max 1 phone call). A website button’s URL may end with one variable for dynamic links, e.g.
https://example.com/track/$(orderid). - 6
Submit for approval
Click Submit Template for Approval and confirm. The template is sent to Meta for review.
Creating an Authentication (OTP) template
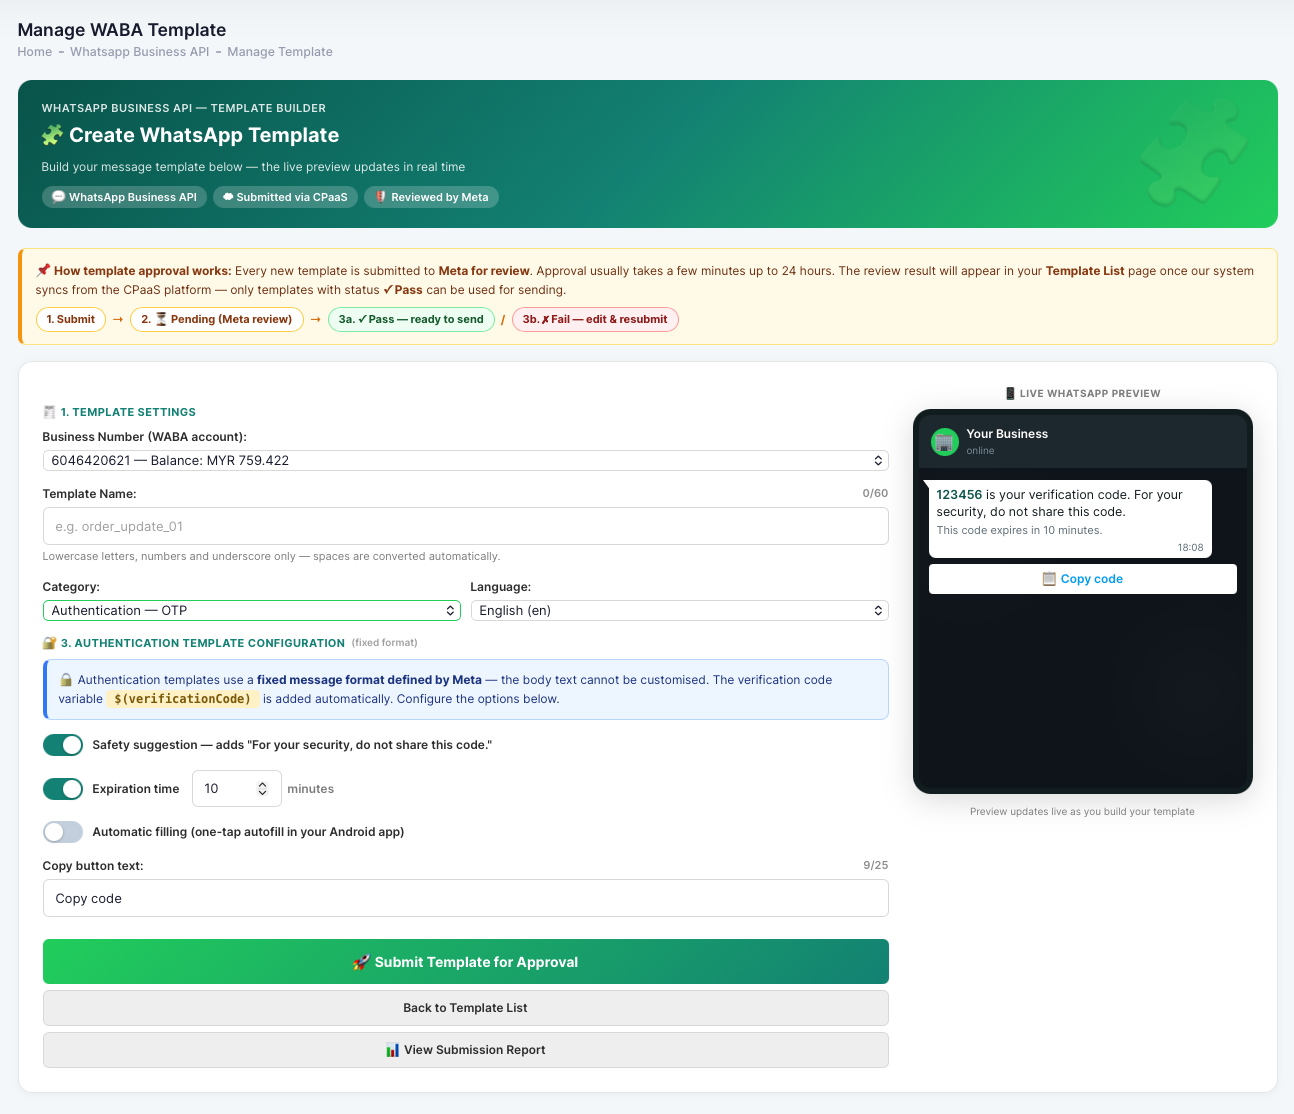
Choose Authentication — OTP as the category and the builder switches to a fixed-format panel — Meta defines the message wording for authentication templates, so the body cannot be customised.
- 1
Configure the options
Safety suggestion adds “For your security, do not share this code.” to the message. Expiration time adds “This code expires in N minutes.” (1–90). Automatic filling enables one-tap autofill in your Android app (requires your app’s package name and signature hash). Set the Copy button text — default “Copy code”.
- 2
Check the preview & submit
The preview shows the final message with a sample code (
123456). When you later send with this template, you supply the real code through the$(verificationCode)variable. Click Submit Template for Approval.
$(verificationCode) variable.After you submit — Meta approval
Every new template is reviewed by Meta — usually within a few minutes, up to 24 hours. The result appears in your Template List once our system syncs: Pass means the template is ready to send; Fail means it was rejected and you can edit and resubmit. Only templates with status Pass can be used for sending.